スライダーの定番「slick」は、jQueryベースながらレスポンシブ対応をしている多機能スライダープラグインです。
そんなslickを使わずに、ネイティブなJavaScriptと「Swiper」を使い、参考にさせて頂いたサイトのスニペットをベースにモーダルxスライダーのUIを作ります。
Swiper
Swiperは、スライダー・カルーセルUIの超定番とも言えるJavaScriptのライブラリです。

カスタマイズが容易で、スマホのスワイプにも対応しているので非常に便利なライブラリです。
ネイティブなJavaScriptなので、jQuery不要でスライダーを実装できます。
以下の記事では、このSwiper.jsについて解説していますので詳細は以下の記事もご覧ください。
 スライダーの超定番ライブラリSwiper.jsの基本と使い方
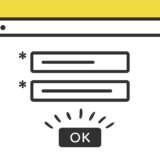
モーダルでスライダーを表示するサンプル
早速Swiperを使ったサンプルです。
6つのボタンがあり、各ボタンをクリックすることでモーダルが表示され、それぞれのボタンに対応したスライダーが表示されます。
スライダーが表示されると、左右の矢印で切り替えもできます。
実装の手順と方法

スニペットのご紹介の前に、実装の手順と方法について簡単にご説明します。
はじめにSwiper本体を読み込ませる必要があるので、以下のコードをHTMLの <head>〜</head> の中に記述しましょう。
<link
  rel="stylesheet"
  href="https://unpkg.com/swiper@7/swiper-bundle.min.css"
/>
<script src="https://unpkg.com/swiper@7/swiper-bundle.min.js"></script>
上記は記述するだけでOKなCDNでの読み込みの場合です。
次に、設置したい場所へHTMLを記述します。
<div class="javaSample">
   <!-- コンテンツ -->
    <div class="swiperModalButton">
      <button class="modalOpen" data-modal="1">スライダー1</button>
      <button class="modalOpen" data-modal="2">スライダー2</button>
      <button class="modalOpen" data-modal="3">スライダー3</button>
      <button class="modalOpen" data-modal="4">スライダー4</button>
      <button class="modalOpen" data-modal="5">スライダー5</button>
      <button class="modalOpen" data-modal="6">スライダー6</button>
    </div>

    <!-- モーダル -->
    <div class="modal" id="modal">
      <div class="modal__overlay modalClose"></div>
      <div class="modal__content">
        <div class="modal_inner">
        <div class="modal__close-btn modalClose" aria-label="閉じる"><span class="lineClose"></span></div>
        <!-- スライダー -->
        <div class="swiper modalInSlider">
          <div class="swiper-wrapper">
            <div class="swiper-slide modalInSlider"><p class="swiperText">スライド1</p></div>
            <div class="swiper-slide modalInSlider"><p class="swiperText">スライド2</p></div>
            <div class="swiper-slide modalInSlider"><p class="swiperText">スライド3</p></div>
            <div class="swiper-slide modalInSlider"><p class="swiperText">スライド4</p></div>
            <div class="swiper-slide modalInSlider"><p class="swiperText">スライド5</p></div>
            <div class="swiper-slide modalInSlider"><p class="swiperText">スライド6</p></div>
          </div>
        </div>
        </div>
          <div class="swiper-button-prev"></div>
          <div class="swiper-button-next"></div>
      </div>
    </div>
<!-- ここまで -->
</div>次に、JavaScriptのコードをページに記述します。
コードは <body>〜</body> で、</body> の閉じタグ(クロージングタグ)の前に記述しましょう。
window.addEventListener("DOMContentLoaded", () => {
  // モーダルを取得
  const modal = document.getElementById("modal");
  // モーダルを開く
  const openModalBtns = document.querySelectorAll(".modalOpen");
  // モーダルを閉じる
  const closeModalBtns = document.querySelectorAll(".modalClose");

  // Swiperの設定
  const swiper = new Swiper(".swiper", {
    loop: true,
    navigation: {
      nextEl: ".swiper-button-next",
      prevEl: ".swiper-button-prev",
    },
    spaceBetween: 30, //任意のマージン
  });

  // モーダルのボタンクリック
  openModalBtns.forEach((openModalBtn) => {
    openModalBtn.addEventListener("click", () => {
      // data-modalで設定したスライド番号を取得
      const modalIndex = openModalBtn.getAttribute('data-modal');
      swiper.slideTo(modalIndex);
      modal.classList.add("is-active");
    });
  });

  // モーダルの閉じるボタンクリック
  closeModalBtns.forEach((closeModalBtn) => {
    closeModalBtn.addEventListener("click", () => {
      modal.classList.remove("is-active");
    });
  });
});最後に、見た目を整える為CSSを記述します。
/* ---------------------------- */
/* --- Base --- */
/* ---------------------------- */
.swiperModalButton {
    display: flex;
    flex-wrap: wrap;
    gap: 20px;
    justify-content: space-around;
}

/* モーダル */
.modal {
  position: fixed;
  top: 0;
  left: 0;
  width: 100%;
  height: 100vh;
  padding: 30px;
  display: flex;
  align-items: center;
  justify-content: center;
  transition: opacity 0.3s;
  pointer-events: none;
  opacity: 0;
  z-index: 100;
  background-color: rgba(255, 255, 255, 0.9);
}

/* モーダルがactiveの時 */
.modal.is-active {
  opacity: 1;
  pointer-events: auto;
}

/* モーダル背景のオーバーレイ部分 */
.modal__overlay {
  position: absolute;
  width: 100%;
  height: 100%;
  cursor: pointer;
}

/* モーダルのコンテンツ */
.modal__content {
    position: relative;
    width: 100%;
    max-width: 800px;
    padding: 20px;
}
.modal_inner {
    filter: drop-shadow(0px 0px 4px #ddd);
    background: #FFF;
    width: 90%;
    margin: 0 auto;
    border-radius: 2px;
    padding: 20px 25px;
    display: flex;
    justify-content: flex-start;
    align-items: center;
}

/* 閉じるボタン */
.modal__close-btn {
    position: absolute;
    right: 0;
    top: -40px;
    width: 40px;
    height: 40px;
    cursor: pointer;
    z-index: 20;
}
.modal__close-btn:hover {
    opacity: 0.8;
}

/* 閉じるボタンのX */
.lineClose {
    display: inline-block;
    vertical-align: middle;
    color: #313131;
    line-height: 1;
    width: 2rem;
    height: 0.1rem;
    background: currentColor;
    border-radius: 0.1rem;
    position: relative;
    transform: rotate(45deg);
}
.lineClose::before {
  content: '';
  position: absolute;
  top: 0;
  left: 0;
  width: 100%;
  height: 100%;
  background: inherit;
  border-radius: inherit;
  transform: rotate(90deg);
}
p.swiperText {
    margin: 0;
    text-align: center;
}
これで完了です!
ざっくりとしたコードの解説
コードはHTML・JavaScript・CSSの3種です。ざっくりですが、順に解説していきます。
HTML
HTMLでは、まずはじめにSwiper本体を読み込ませる必要があるので、以下のコードをHTMLの <head>〜</head> の中に記述しましょう。
<link
  rel="stylesheet"
  href="https://unpkg.com/swiper@7/swiper-bundle.min.css"
/>
<script src="https://unpkg.com/swiper@7/swiper-bundle.min.js"></script>上記は記述するだけでOKなCDNでの読み込みの場合です。同じサーバーに置いたファイルとして使う場合は、ダウンロードして設置したパスを記述しましょう。
そして次に、スライダーを設置したい場所に以下のHTMLを記述します。
<div class="javaSample">
   <!-- コンテンツ -->
    <div class="swiperModalButton">
      <button class="modalOpen" data-modal="1">スライダー1</button>
      <button class="modalOpen" data-modal="2">スライダー2</button>
      <button class="modalOpen" data-modal="3">スライダー3</button>
      <button class="modalOpen" data-modal="4">スライダー4</button>
      <button class="modalOpen" data-modal="5">スライダー5</button>
      <button class="modalOpen" data-modal="6">スライダー6</button>
    </div>

    <!-- モーダル -->
    <div class="modal" id="modal">
      <div class="modal__overlay modalClose"></div>
      <div class="modal__content">
        <div class="modal_inner">
        <div class="modal__close-btn modalClose" aria-label="閉じる"><span class="lineClose"></span></div>
        <!-- スライダー -->
        <div class="swiper modalInSlider">
          <div class="swiper-wrapper">
            <div class="swiper-slide modalInSlider"><p class="swiperText">スライド1</p></div>
            <div class="swiper-slide modalInSlider"><p class="swiperText">スライド2</p></div>
            <div class="swiper-slide modalInSlider"><p class="swiperText">スライド3</p></div>
            <div class="swiper-slide modalInSlider"><p class="swiperText">スライド4</p></div>
            <div class="swiper-slide modalInSlider"><p class="swiperText">スライド5</p></div>
            <div class="swiper-slide modalInSlider"><p class="swiperText">スライド6</p></div>
          </div>
        </div>
        </div>
          <div class="swiper-button-prev"></div>
          <div class="swiper-button-next"></div>
      </div>
    </div>
<!-- ここまで -->
</div>スライダーの中は、class名 swiper-slide modalInSlider 要素の中に記述すればOKです。
JavaScript
JavaScriptは大きく分けて「モーダル」「Swiper」「モーダルのボタンクリック」「モーダルの閉じるボタン」の4つです。
window.addEventListener("DOMContentLoaded", () => {
  // モーダルを取得
  const modal = document.getElementById("modal");
  // モーダルを開く
  const openModalBtns = document.querySelectorAll(".modalOpen");
  // モーダルを閉じる
  const closeModalBtns = document.querySelectorAll(".modalClose");

  // Swiperの設定
  const swiper = new Swiper(".swiper", {
    loop: true,
    navigation: {
      nextEl: ".swiper-button-next",
      prevEl: ".swiper-button-prev",
    },
    spaceBetween: 30, //任意のマージン
  });

  // モーダルのボタンクリック
  openModalBtns.forEach((openModalBtn) => {
    openModalBtn.addEventListener("click", () => {
      // data-modalで設定したスライド番号を取得
      const modalIndex = openModalBtn.getAttribute('data-modal');
      swiper.slideTo(modalIndex);
      modal.classList.add("is-active");
    });
  });

  // モーダルの閉じるボタンクリック
  closeModalBtns.forEach((closeModalBtn) => {
    closeModalBtn.addEventListener("click", () => {
      modal.classList.remove("is-active");
    });
  });
});
スライダーに使っているSwiperは、オプションで左右の矢印の有無や、進捗インジケーターの表示・非表示などの設定を変えることができますが、このコードでは左右の矢印と任意のマージンのオプションです。
CSS
CSSは、Swiperのスライダーの中にテキストのみなので、モーダルのスタイルが中心の記述です。
/* ---------------------------- */
/* --- Base --- */
/* ---------------------------- */
.swiperModalButton {
    display: flex;
    flex-wrap: wrap;
    gap: 20px;
    justify-content: space-around;
}

/* モーダル */
.modal {
  position: fixed;
  top: 0;
  left: 0;
  width: 100%;
  height: 100vh;
  padding: 30px;
  display: flex;
  align-items: center;
  justify-content: center;
  transition: opacity 0.3s;
  pointer-events: none;
  opacity: 0;
  z-index: 100;
  background-color: rgba(255, 255, 255, 0.9);
}

/* モーダルがactiveの時 */
.modal.is-active {
  opacity: 1;
  pointer-events: auto;
}

/* モーダル背景のオーバーレイ部分 */
.modal__overlay {
  position: absolute;
  width: 100%;
  height: 100%;
  cursor: pointer;
}

/* モーダルのコンテンツ */
.modal__content {
    position: relative;
    width: 100%;
    max-width: 800px;
    padding: 20px;
}
.modal_inner {
    filter: drop-shadow(0px 0px 4px #ddd);
    background: #FFF;
    width: 90%;
    margin: 0 auto;
    border-radius: 2px;
    padding: 20px 25px;
    display: flex;
    justify-content: flex-start;
    align-items: center;
}

/* 閉じるボタン */
.modal__close-btn {
    position: absolute;
    right: 0;
    top: -40px;
    width: 40px;
    height: 40px;
    cursor: pointer;
    z-index: 20;
}
.modal__close-btn:hover {
    opacity: 0.8;
}

/* 閉じるボタンのX */
.lineClose {
    display: inline-block;
    vertical-align: middle;
    color: #313131;
    line-height: 1;
    width: 2rem;
    height: 0.1rem;
    background: currentColor;
    border-radius: 0.1rem;
    position: relative;
    transform: rotate(45deg);
}
.lineClose::before {
  content: '';
  position: absolute;
  top: 0;
  left: 0;
  width: 100%;
  height: 100%;
  background: inherit;
  border-radius: inherit;
  transform: rotate(90deg);
}
p.swiperText {
    margin: 0;
    text-align: center;
}
「✖️」はFontawesomeを使わず、CSSで記述しているので別に何か読み込ませる必要はありません。
参考サイト
この記事では、「webdev.tech.」さんを参考にさせて頂きました。
参考 素のJSとSwiperでモーダル内にスライダーを表示する方法webdev.tech.詳しい解説は、参考元の「webdev.tech.」さんにわかりやすい内容の記載があるので、上記をご覧ください。
さいごに
モーダル+スライダーは、使い勝手の良いUIなので実装してみてはいかがでしょうか?
以下の記事では、このスニペットを使ってプロフィールカードを作っているのでこちらも併せて参考にしてみてください。
 コピペでできるSwiperを使ったモーダル+スライダーのプロフィールカードのスニペット