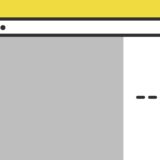
ブログのような縦に長いページに「プログレスバー」を入れると、全体の印象やデザインにも奥行きが出るのでオススメです。
今回は、「縦」のプログレスバーです。
簡単なコードで実装できるので、ぜひ参考にしてもらえたら嬉しいです。
.clientHeight
JavaScriptの .clientHeight は、 水平スクロールバーの高さを計算するプロパティです。
const ElemClientHeight = element.clientHeight;この記事では .clientHeightに加えて、垂直方向のスクロール量を返す pageYOffset プロパティを使ってプログレスバーを作っています。
プログレスバーのサンプル
サンプルですが、この記事をご覧の場合は右隅にプログレスバーがあると思います。これがサンプルですが、画面のスクロールに応じて可変していきます。
縦に長いブログ系のページに親和性の高そうなオブジェクトです。
実装の手順と方法
コードの解説の前に、ざっくりとした実装の手順と方法について解説します。
次に、JavaScriptのコードをページに記述します。
コードは <body>〜</body> で、</body> の閉じタグ(クロージングタグ)の前に記述しましょう。
const documentBody = document.querySelector('body');
// body直下にオーバーレイの要素を作成
var newElement = document.createElement("div");
newElement.setAttribute("class","progress-bar");
documentBody.prepend(newElement);
(function progressBar(){
  const bar = document.querySelector('.progress-bar');
  window.addEventListener('scroll', function updateBar(){
    const windowScroll = window.pageYOffset;
    const docHeight = document.body.clientHeight;
    const windowHeight = window.innerHeight;

    const scrollUnit = (windowScroll / (docHeight - windowHeight) * 100);
    bar.style.height = scrollUnit + "%";
  })
}());JavaScriptのコードは、設置したページのHTMLを body の一番手前の子要素に <div class="progress-bar"></div> を出力します。
言い換えると、JavaScriptのコードを書くと、そのページにHTMLが出力されてプログレスバーが表示されてしまいます。
ので、もしもページによってプログレスバーの出し分けをしたい場合は、以下のHTMLとJavaScritpのコードを別にした形のコードを記述するようにしてください。
<div class="progress-bar"></div>(function progressBar(){
const bar = document.querySelector('.progress-bar');
window.addEventListener('scroll', function updateBar(){
const windowScroll = window.pageYOffset;
const docHeight = document.body.clientHeight;
const windowHeight = window.innerHeight;
const scrollUnit = (windowScroll / (docHeight - windowHeight) * 100);
bar.style.height = scrollUnit + "%";
})
}());次にCSSを記述します。
.progress-bar{
width: 5px;
height: 0;
background-color: #707070;
position: fixed;
top: 0;
right: 30px;
z-index: 200;
}
.progress-bar:before {
content: "";
width: 5px;
height: 100%;
background-color: rgb(0,0,0,.1);
position: fixed;
top: 0;
right: 30px;
z-index: 199;
}
.progress-bar:after {
width: 18px;
height: 18px;
content: "";
position: absolute;
background: #313131;
z-index: 199;
bottom: 0;
left: 50%;
transform: translateX(-50%);
border-radius: 9999px;
}ざっくりとしたコードの解説
コードは、JavaScriptのCSSの2種類です。ざっくりですが、順に解説していきます。
JavaScript
JavaScriptは、はじめに body タグの最初の子要素に「progress-bar」のclass名を持つ要素を挿入します。
const documentBody = document.querySelector('body');
// body直下にオーバーレイの要素を作成
var newElement = document.createElement("div");
newElement.setAttribute("class","progress-bar");
documentBody.prepend(newElement);
(function progressBar(){
  const bar = document.querySelector('.progress-bar');
  window.addEventListener('scroll', function updateBar(){
    const windowScroll = window.pageYOffset;
    const docHeight = document.body.clientHeight;
    const windowHeight = window.innerHeight;

    const scrollUnit = (windowScroll / (docHeight - windowHeight) * 100);
    bar.style.height = scrollUnit + "%";
  })
}());要素を挿入した後は、.addEventListener のスクロールトリガーで発動して高さを取得する関数を作っていき、高さを「progress-bar」の要素の高さに連動させてプログレスバーを表示させます。
CSS
CSSは、「progress-bar」のclass名を持つ要素を、画面の右横に「fixed」で表示させて、before と after の擬似要素で装飾を加えます。
  .progress-bar{
    width: 5px;
    height: 0;
    background-color: #707070;
    position: fixed;
    top: 0;
    right: 30px;
    z-index: 200;
  }
.progress-bar:before {
    content: "";
    width: 5px;
    height: 100%;
    background-color: rgb(0,0,0,.1);
    position: fixed;
    top: 0;
    right: 30px;
    z-index: 199;
}
.progress-bar:after {
    width: 18px;
    height: 18px;
    content: "";
    position: absolute;
    background: #313131;
    z-index: 199;
    bottom: 0;
    left: 50%;
    transform: translateX(-50%);
    border-radius: 9999px;
}スマホでも右側に出てしまい邪魔になるので、必要に応じてメディアクエリも書いて調整ください。
さいごに
プログレスバーの多くは、横長の棒のような形状を見かけますが、縦に長いブログのようなページなら、縦の形状もマッチします。
これ以外にも、「%(パーセンテージ)」等の記載も含め、プログレスバーのデザインは色々あるので色々試してみてください。


