JavaScriptで記事内の h タグから目次を作り、それをアコーディオンにして開閉させます。

WordPressの目次プラグイン「+TOC」でできるオブジェクトをJavaScriptで作る感じです。
コード量が多めですが、順に解説していきます。
目次
.createElement()と.nextElementSibling
この記事で使っているJavaScriptの .createElement() と .nextElementSibling の2つについて解説していきます。
.createElement()
JavaScriptの.createElement() は、要素を作成するメソッドで以下のような記述です。
const element = document.createElement(タグ名).createElement() で作成した要素は、末尾に追加する.appendChild() 、指定した要素の前に追加するinsertBefore() メソッドと併用します。
使い方や例の詳細は、以下の記事がとても分かりやすいので参考にしてみてください。
参考 Document.createElement()MDN Web Docs.nextElementSibling
nextElementSiblingは、隣接する次の要素を取得するプロパティです。
この記事のスニペットでは、「表示・非表示」のボタンの次の要素に当たる ul タグのアコーディオンの開閉で使っています。
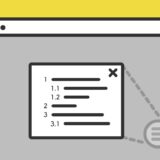
アコーディオンで開閉する目次のサンプル
早速、目次のサンプルです。
目次
この記事上部にある目次と全く同じ見た目ですが、ここにあるのがJavaScriptで生成した目次です。
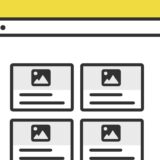
サンプルのコード
サンプルのコードは、HTML・CSS・JavaScriptの3種類です。全て記述量が多いので、それぞれ解説していきます。
HTML
HTMLは、目次一式のコンテナで <ul id="tocBlock" class="show"></ul> の部分にJavaScriptで目次のテキストを出力します。
<div class="accordionToc">
<p>目次</p><button class="accordion-header active"></button>
<ul id="tocBlock" class="show"></ul>
</div>
また、この目次のコンテナは、ページが開いた時にアコーディオンが展開しているよう、「accordion-header」の button タグに「active」を付け、目次を表示するidが「tocBlock」の ul タグには「show」のclassを付与しておきます。
JavaScript
JavaScriptは、.addEventListener の「DOMContentLoaded」で目次生成の読み込みを開始します。この「DOMContentLoaded」は、DOMの描画が全て終わり画像やCSS等を読み込む前に発火するイベントです。
そのタイミングで発火したら、全体的には「ページ内の指定タグを取得(ここではh2 とh3) → 目次を生成 → アコーディオンの開閉の読み込み」の流れのコード内容です。
document.addEventListener('DOMContentLoaded', function() {
    htmlTableOfContents();
} );

function htmlTableOfContents( documentRef ) {
    var documentRef = documentRef || document;
    var toc = documentRef.getElementById("tocBlock");
    var headings = [].slice.call(documentRef.body.querySelectorAll('.entry-content h2, .entry-content h3')); /* ここで目次で取得するタグを指定 */
    headings.forEach(function (heading, index) {
        var ref = "toc" + index;
        if ( heading.hasAttribute( "id" ) )
            ref = heading.getAttribute( "id" );
        else
            heading.setAttribute( "id", ref );

        var link = documentRef.createElement( "a" );
        link.setAttribute( "href", "#"+ ref );
        link.textContent = heading.textContent;

        var div = documentRef.createElement( "li" );
        div.setAttribute( "class", heading.tagName.toLowerCase() );
        div.appendChild( link );
        toc.appendChild( div );
    });
}

try {
    module.exports = htmlTableOfContents;
} catch (e) {
}

//accordion
var acc = document.getElementsByClassName("accordion-header");
var i;

for (i = 0; i < acc.length; i++) {
    acc[i].onclick = function(){
        this.classList.toggle("active");
        this.nextElementSibling.classList.toggle("show");
  }
}目次は、ページ内「entry-content」class内にある h2 h3 タグを取得して出力する設定です。
CSS
CSSも記述量が多めです。
.accordionToc {
    border-top: solid 5px #313131;
    background: #fefefe;
    margin: 35px auto;
    padding: 25px 32px;
    box-shadow: 0 1.5px 2.4px rgb(0 0 0 / 15%);
}
.accordionToc p, button.accordion-header {
    display: inline-block;
    margin: 0;
    width: auto;
}
.accordionToc p {
    margin-right: 20px;
    font-size: 1.2rem;
    font-weight: 600;
    position: relative;
}
.accordionToc p:before {
    background: #313131;
    border-radius: 9999px;
    width: 50px;
    height: 50px;
    display: inline-block;
    vertical-align: middle;
    line-height: 50px;
    margin-right: 8px;
    color: #FFF;
    content: "\f0ca";
    font-family: "Font Awesome 5 Free" !important;
    font-weight: 900;
    text-align: center;
    font-size: 1.3rem;
}
.accordion-header {
    cursor: pointer;
    line-height: 1.35;
    margin: 0;
    padding: 4px 16px;
    text-decoration: none;
    transition: all 0.2s ease 0s;
    position: relative;
    border-radius: 5px;
    background: #cbcbcb;
    color: #fff;
    border: none;
    font-size: 0.8rem;
    vertical-align: 2px;
}
button.accordion-header:before {
    content: "[ 表示 ]";
}
button.accordion-header.active:before {
    content: "[ 非表示 ]";
}
#tocBlock {
    background-color: #fff;
    display: none;
    overflow: hidden;
    border: none;
    animation: fadeIn 0.7s ease 0s 1 normal;
    list-style: none;
    padding: 20px 0 0;
    margin: 20px 0 0;
    border-top: 1px solid rgba(0,0,0,.1);
}
#tocBlock.show {
  display: block;
}
li.h2, li.h3 {
    margin: 0;
    font-size: 1rem;
    line-height: 1;
    padding: 0;
    position: relative;
}

ul#tocBlock li:before {
    content: "\f00c";
    background: none;
    font-family: "Font Awesome 5 Free" !important;
    font-weight: 900;
    color: #f0db40;
    top: 50%;
    left: 0;
    position: absolute;
    transform: translateY(-50%);
}
ul#tocBlock li.h3 {
    margin-left: 7px;
}
ul#tocBlock li.h3:before {
    content: '\f105';
    font-size: 1.3rem;
    left: 23px;
}
ul#tocBlock li a {
    line-height: 1.3;
    margin: 10px 0 4px 28px;
    display: inline-block;
    color: #313131;
    position: relative;
    padding-bottom: 8px;
}
ul#tocBlock li.h3 a {
    margin-left: 43px;
    font-weight: 400;
}
ul#tocBlock li.h3:after {
    content: "";
    width: 2px;
    height: 100%;
    background: #fff4a2;
    position: absolute;
    left: 0;
}

ul#tocBlock li a:after {
    content: "";
    width: 0;
    height: 2px;
    background: #e6d340;
    bottom: 3px;
    left: 0;
    position: absolute;
    transition: all .3s ease;
}
ul#tocBlock li a:hover:after {
    width: 100%;
}

@keyframes fadeIn {
  0% {
    opacity: 0;
    transform: translateY(-20px);
  }
  100% {
    opacity: 1;
  }
}目次の左にあるアイコンや、チェックマーク・矢印マークは全てFontawesomeです。そのまま使う場合は、Fontawesome本体もページで読み込むように設定ください。